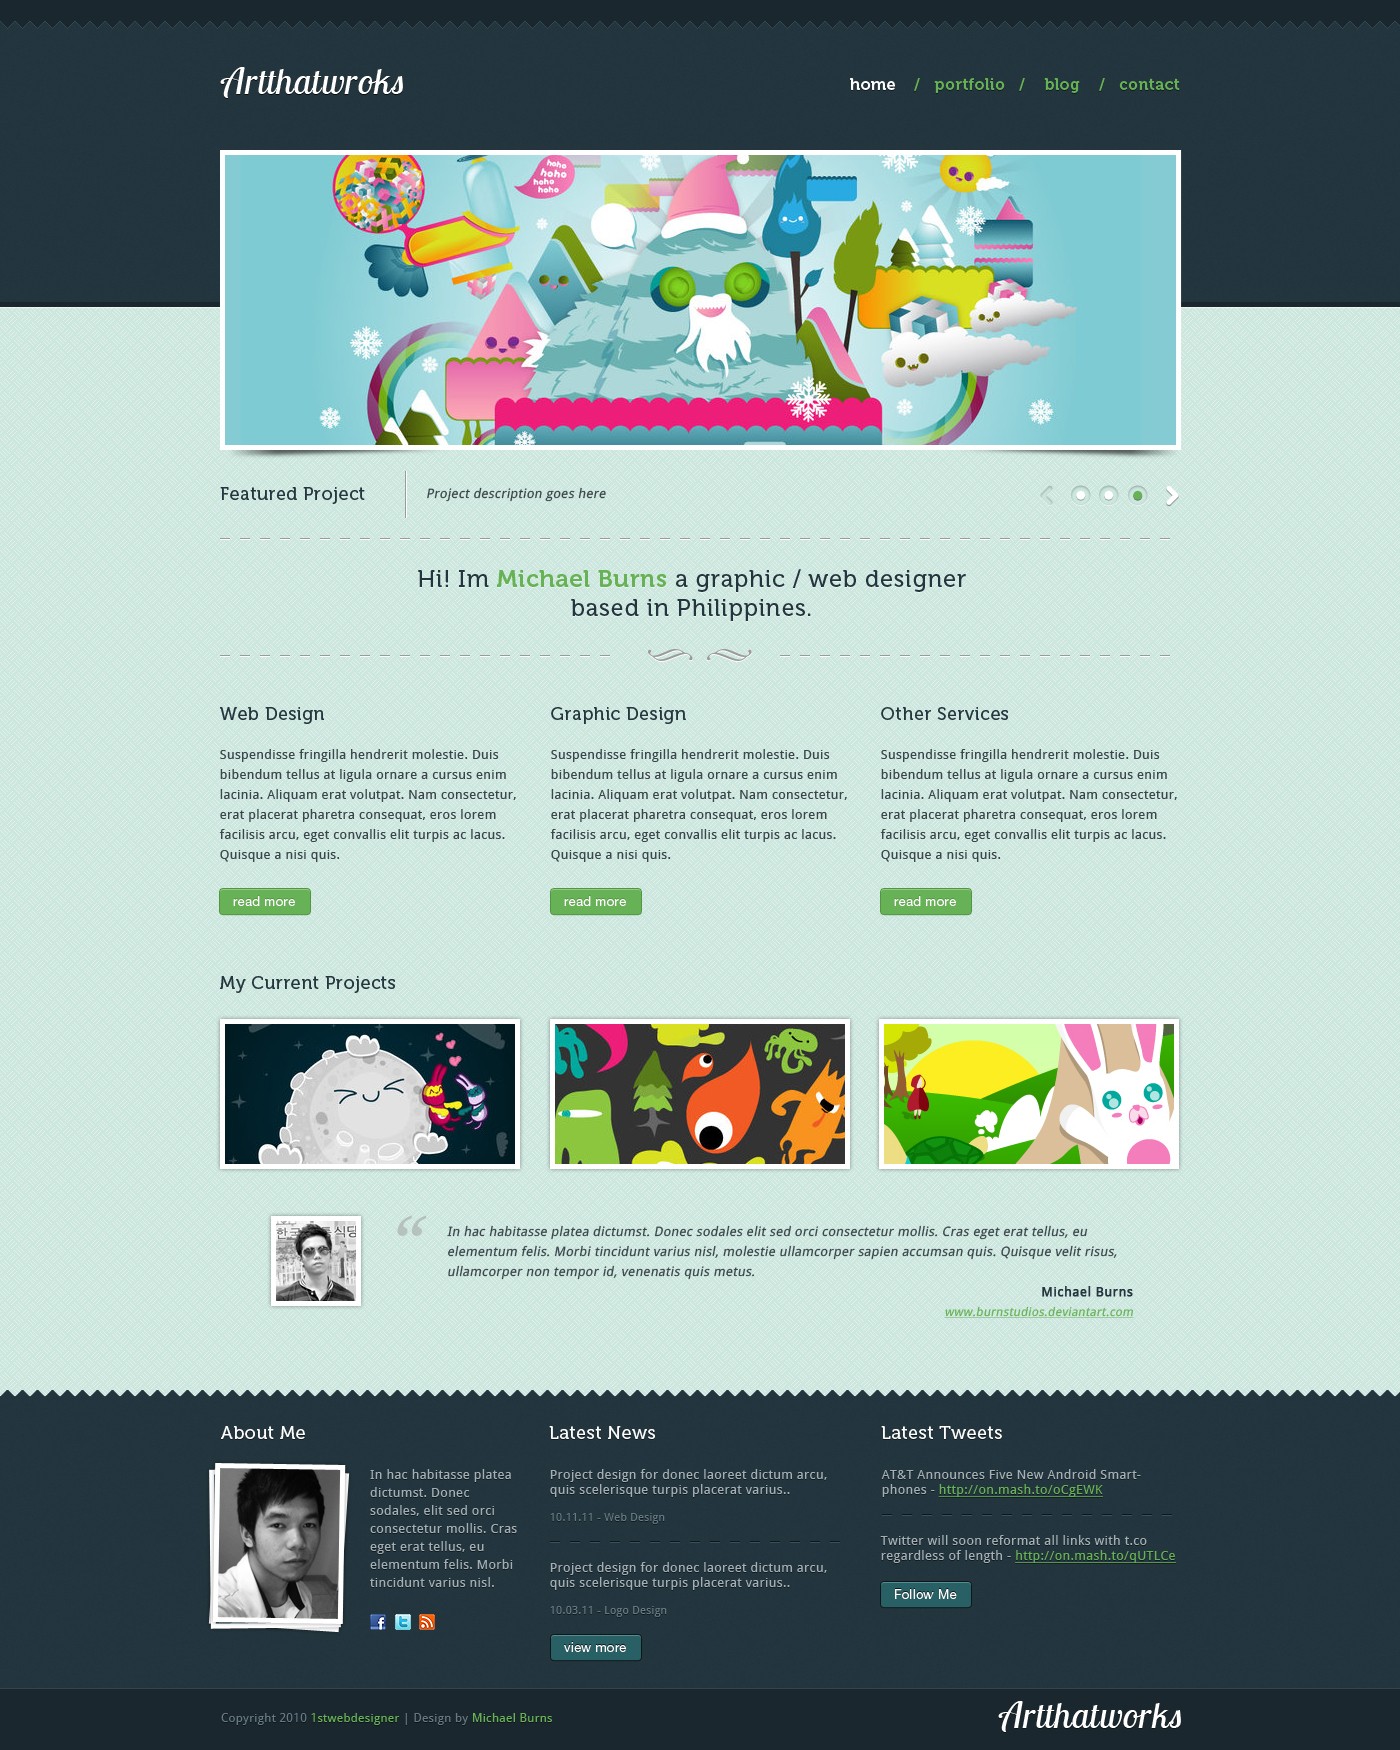
Create A Beautiful Portfolio Landing Page In Adobe Photoshop
21.10.2011
POSTED IN Blog | NO COMMENTS
In this tutorial we will be making an awesome, beautiful portfolio in Adobe Photoshop. The landing page will contain a header section, slider, an eye-catching about you text, what you do, a section for your current project, a footer that will contain about you, latest news, and latest tweets. This tutorial will be detailed so that beginners can follow through. Let’s get started!
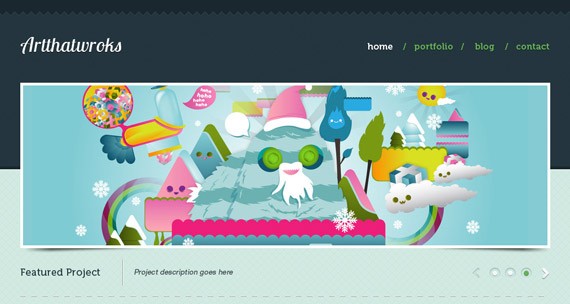
Here is what we will be making, click on the image for a full preview:
Resources for this tutorial
- Pattern
- Social Icons
- Illustrations – Credits to giorgos93.
Step 1: Setting up the Document
Start by creating a 1400px x 1750px document in Photoshop.
Ruler Tool is very useful for this tutorial make sure that rulers and guides is turned on.
- Rulers: Ctrl + R
- Guides: Ctrl + ;
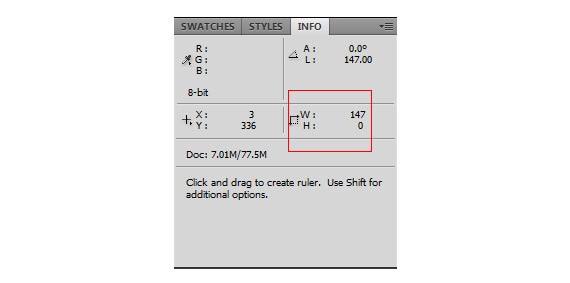
Also one important thing when using Ruler Tool is the Info(Information) Panel. This is very useful when you are measuring using the ruler as the information will be shown in the information panel. Make sure that this is shown in your panels at the right. If it is not shown you can access this by going to Windows – Info.
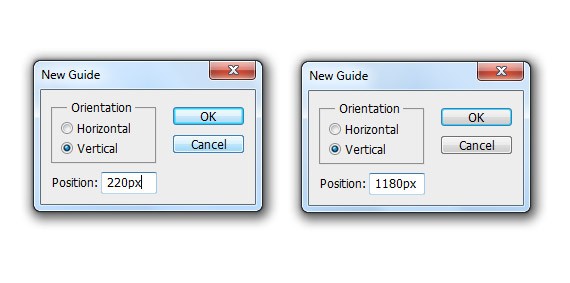
The total width of this site will be 960px. So, let’s create our first guide by going to View – New Guide, set the value to 220px. Repeat the step of create a guide but now change the value to 1180px, this will make a total of960px to the center of our canvas.
Step 2: Working on Background

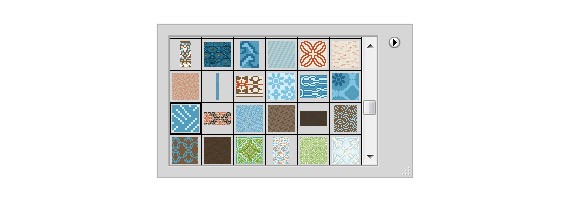
Fill the background layer with #d8e4d6. Download the pattern from the resource above. Now, select Paint Bucket Tool(G) set it to pattern from the dropdown menu.

Select a pattern as shown in the screenshot below. Create a new layer above the background layer and fill it, and lastly set the blend mode to Soft Light.
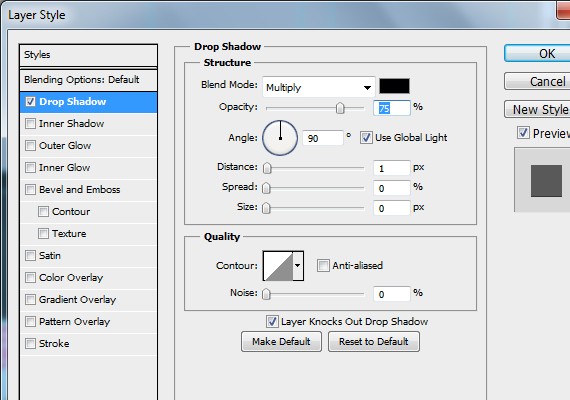
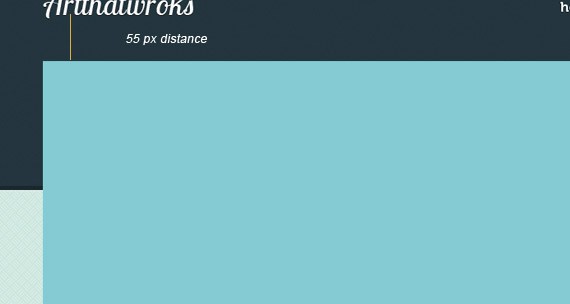
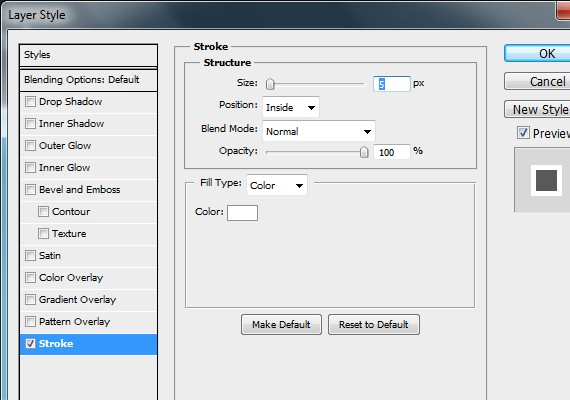
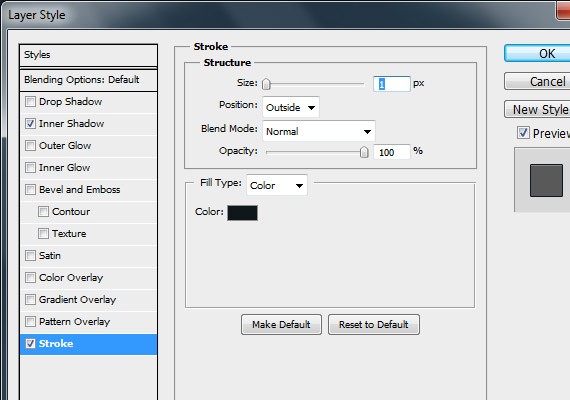
Select Rectangle Tool(U), set the fill color to #23353e. Create a 100% by 330px shape at the very top of the page.
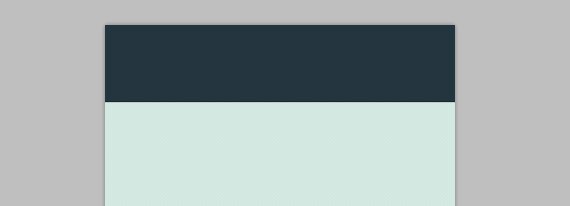
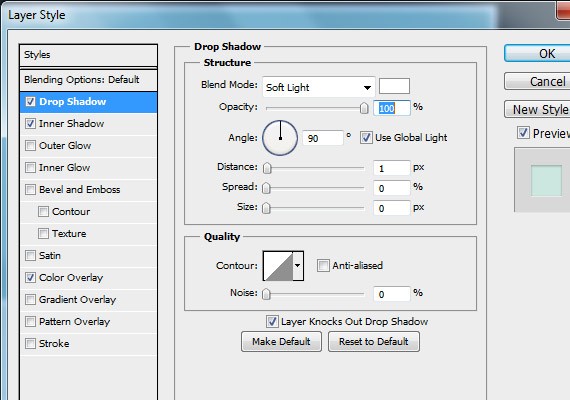
Apply this Blending Option
- Stroke: #1a272e
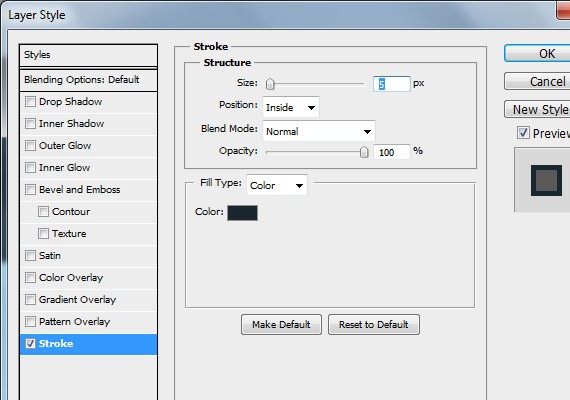
- Drop Shadow: #fff
Go to Filter – Convert for Smart Filters, again go to Filter – Noise- Add Noise.
Step 3: Working on Header

The header section will contain a Logo and Navigation. Remember it is important to organize your layers by naming and grouping them. I will leave it up to you how you organize and name your layers.
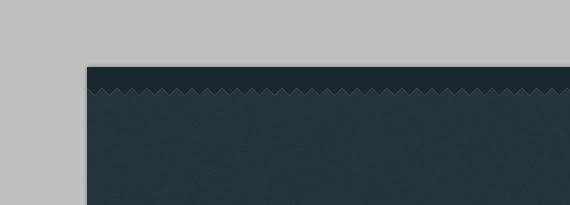
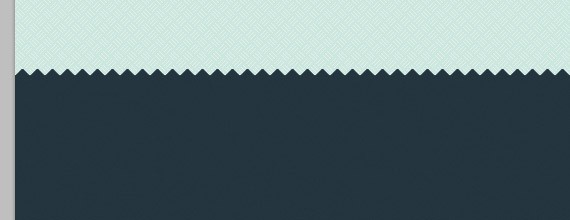
First we will create a zigzag pattern the same as on the preview above. To create it create a new document size15px by 15px, background to transparent. Using Pencil Tool (B) fill color #1a272e create a shape a shown in the screenshot below.

Go to Edit – Define Pattern name it zigzag. Now, using Rectangle Tool (U) with the same fill with our pattern, create a 100% by 20px shape at the very top of the canvas.

Using Rectangular Marquee Tool (M) create a 100% by 15px selection and fill it with the pattern we made using Paint Bucket Tool (G).
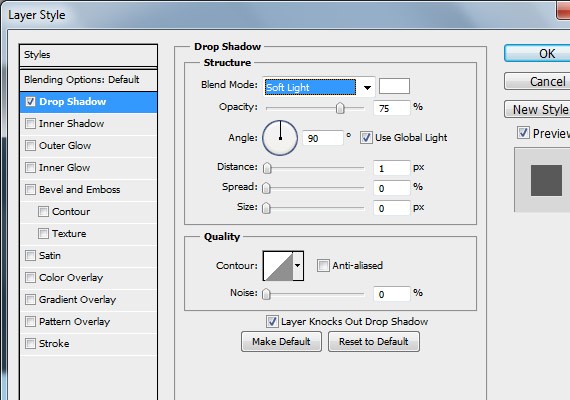
Apply this Blending Option
- Drop Shadow: #fff
Result
Logo

For the logo I used a font name Lobster Two that you can find on Google Fonts. Let’s put up our site logo usingText Tool(T), size 36pt, color #fff.

Apply this Blending Option
- Drop Shadow: #000
Navigation
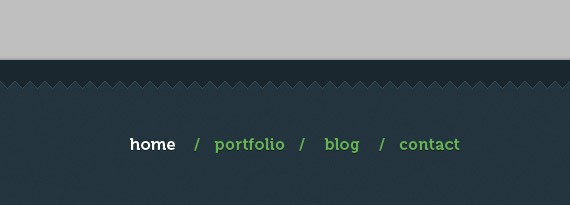
For the navigation I used the font Museo that can also be found on Google Fonts. Select Text Tool (T), Museo 700, size 16pt, color #fff & #67b256 and add this navigation links home, portfolio, blog, contact.
Step 4: Working on Slideshow
The sideshow section will contain image preview, description, and controls.
Image Preview
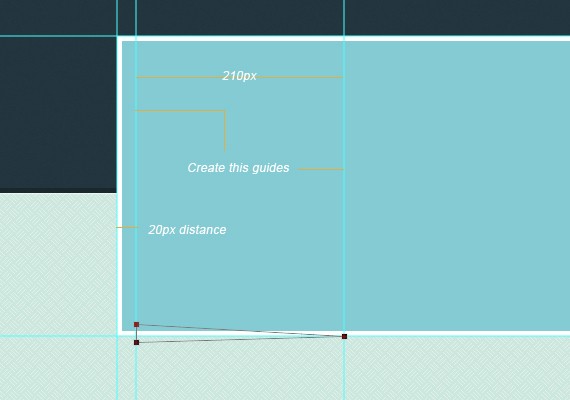
We need to create a base layer to hold the images for our image preview. To do this select Rectangle Tool(U)and create a 960px by 300px shape.
Apply this Blending Option
- Stroke: #fff
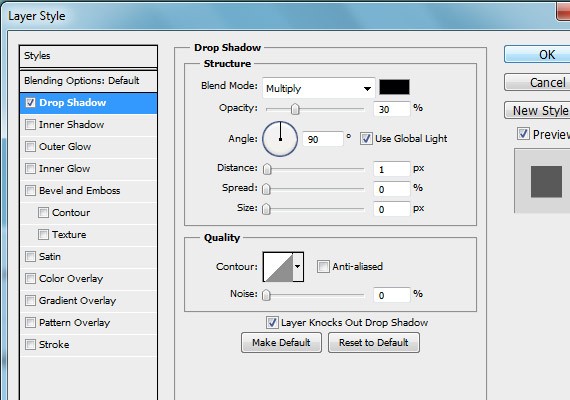
Now that we have a base layer we will create a shadow on both corners so that it will pop up and have some depth. To create a shadow create a shape using Pen Tool(P) as shown in the screenshot below.
Fill the shape with #000. Go to Filter – Blur – Gaussian Blur.
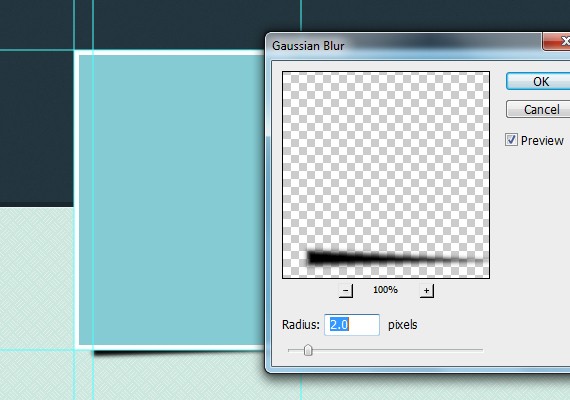
Again go to Filter – Blur – Motion Blur.
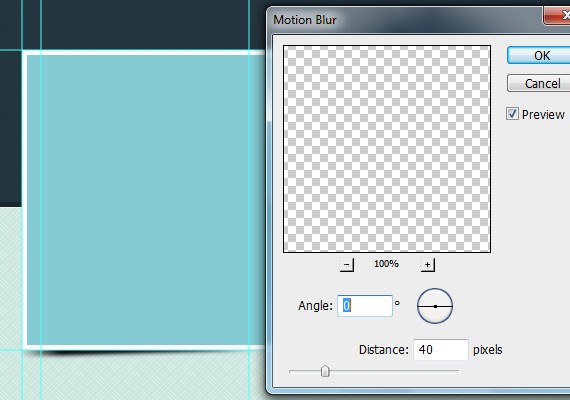
lastly set the layer Opacity to 50%.
Text Description
Using Text Tool(T) add text as shown in the screenshot below.
Slider Controls

To create the next & previous buttons select Rounded Rectangle Tool(U) Radius to 10px. Refer to the screenshot below for the guide.

Merge both shapes and resize it about 13px by 21px.
Apply this Blending Option
- Drop Shadow: #fff
- Inner Shadow: #000

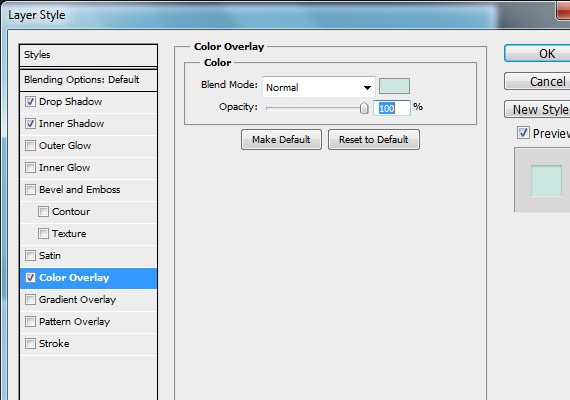
- Color Overlay: #cce7df
Duplicate the arrow and transform it on the other side. Change the Color Overlay to #fff and place it as shown in the screenshot below.

Now that we have our previous & next button, let’s create the identifier “circles” or what ever they call it. UsingEllipse Tool create a 19px by 19px shape color #cce7df. Apply the same Inner Shadow & Drop Shadow as we did in our Previous & Next buttons.

Make a selection of the circle by pressing Ctrl + Click to the vector mask thumbnail of the shape in the layers panel. Go to Select – Modify – Contract. Contract it by 5px and fill with #fff.
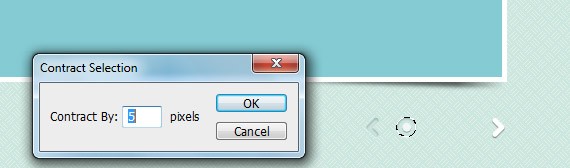
Apply this Blending Option
- Drop Shadow: #000
Group the circles that we have just created and duplicate it 2 times. Select 1 of the circles and change the fill color to #67b256.

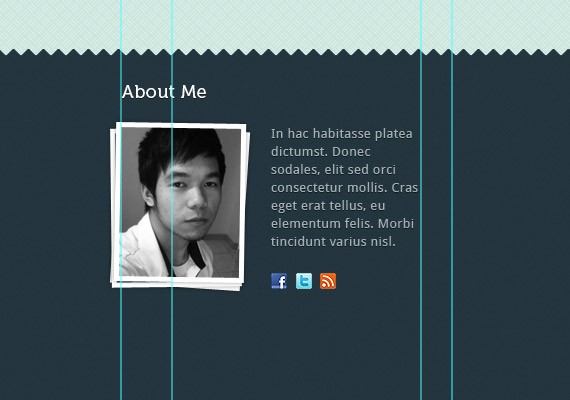
Step 5: Working on About Text

To start let’s create first the dashed lines pattern. Create a 20px by 20px transparent document. Using Pencil Tool(B) color #9b9b9b create a shape as shown in the screenshot below.
Name the pattern anything. Now, create a selection 960px by 20px and fill it with the pattern we just made. Duplicate the layer and apply a Color Overlay #fff.

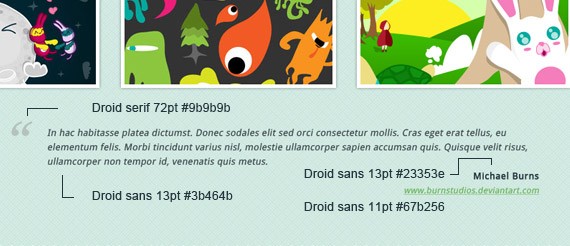
Let’s add our About text using Text Tool(T). After placing the text add a drop shadow color #fff.

Make another selection 40px below the text and repeat the step as we did in making our dashed lines. Delete the middle section of dashed lines. You may have something that looks like in the screenshot below.

We will be placing a cool shape on the middle. Select Shape Tool(U) and select a shape as shown in the screenshot below.
Create that shape with the same fill color of our dashed lines and drop shadow.

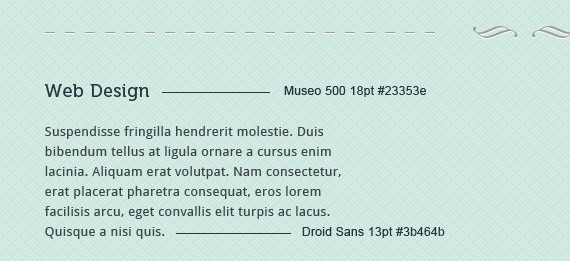
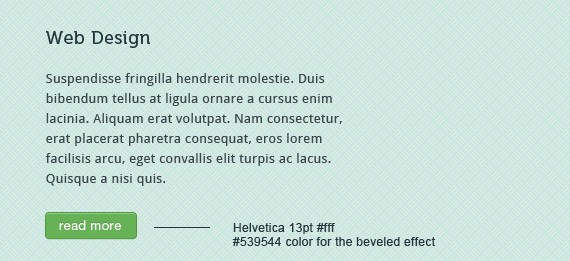
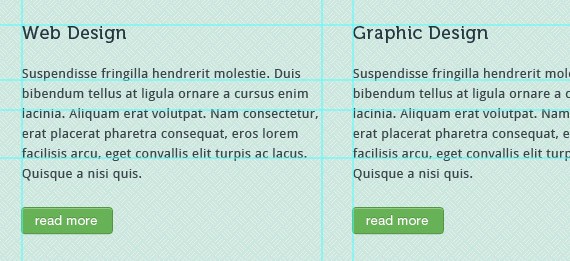
Step 6: Working on What I Do
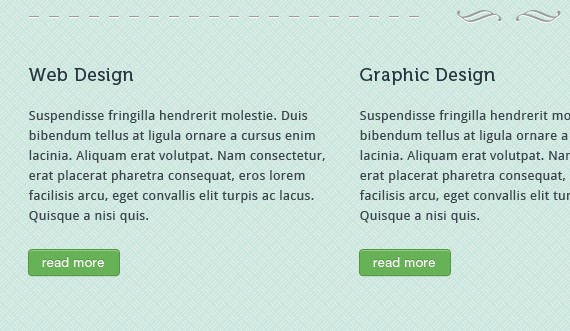
For this section we will just make a title header and a sample description about what you can offer. Also, we will be making a read more button. This section will be divided into 3 columns the width for each column will be300px and the distance from each columns will be 30px I’ll leave you to create a guide for that.
Now, select Text Tool(T) and add a title header and a sample description, refer to the screenshot below for the format.
For the read more button. Select Rounded Rectangle Tool(U), set the Radius to 3px the color will be #67b256. Create a button using it the size will be 90px by 25px.
Apply this Blending Option
- Inner Shadow: #fff
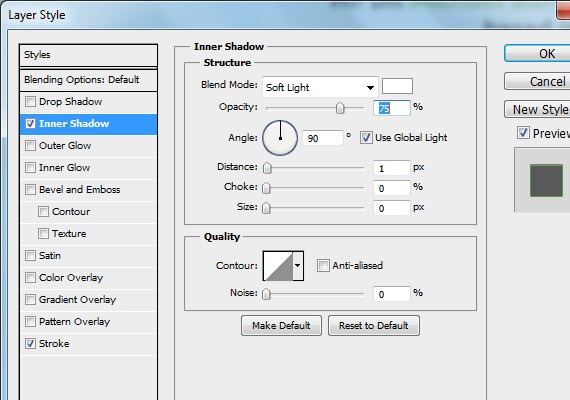
- Stroke: #fff

Result!
Duplicate it twice and place it according to your guides.
Step 7: Working on My Current Projects
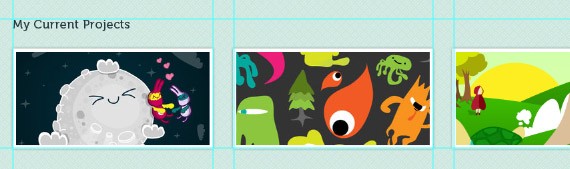
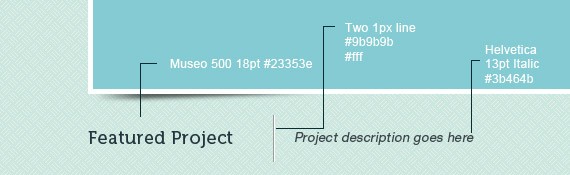
In this section we’re obviously placing our most current projects. The header will be the same text format and color as we did in our what I do. Using Text Tool(T) place the header text 60px below the read more button.
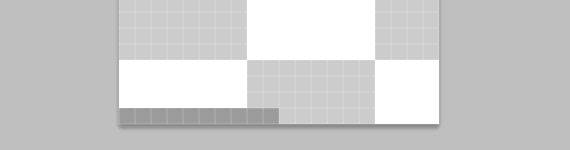
Select Rectangle Tool(U). For the images we will first make a base layer to hold the images, the size will be300px by 150px. Place it 30px below the header.
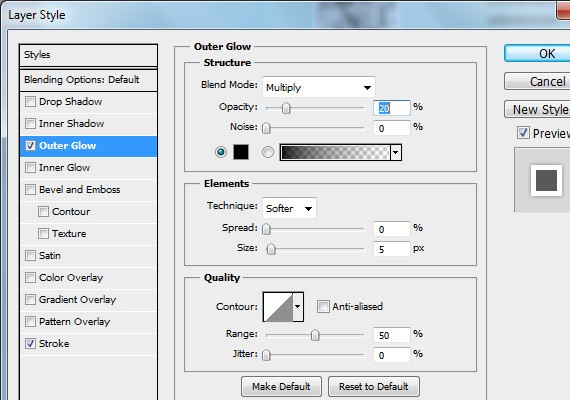
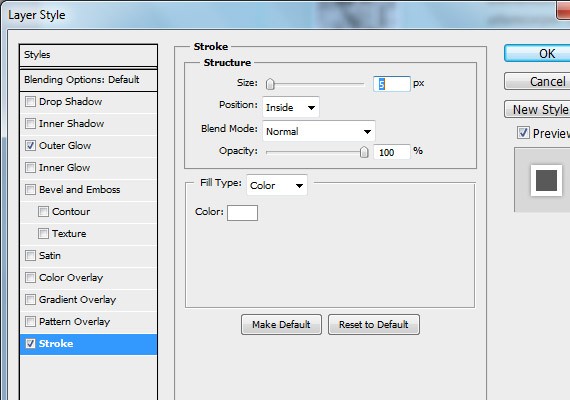
Apply this Blending Option
- Outer Glow: #000
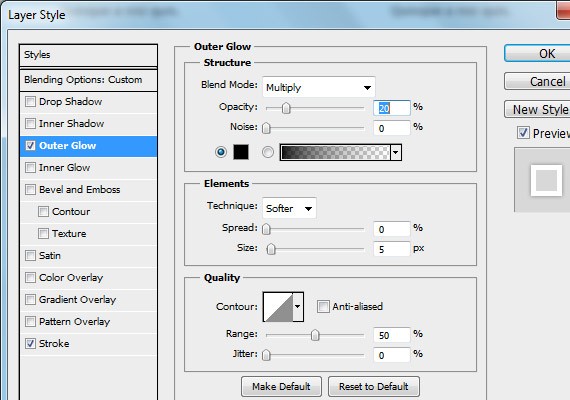
- Stroke: #fff

After applying, duplicate it twice and place it accordingly.

Step 8: Working on Testimonials
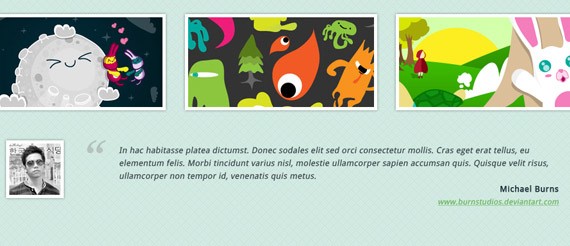
This section will contain thumbnail images of client work, testimonials, name, and a website url. For the image thumbnail create a base 90px by 90px #fff base shape using Rectangle Tool(U). Apply the same outer glow as we did in our current project. Place it as shown in the screenshot below.
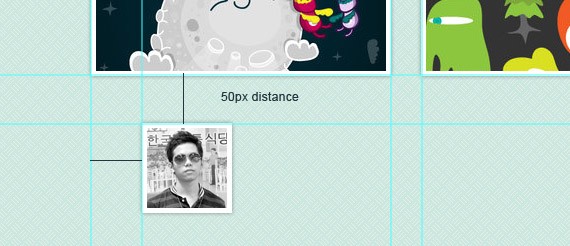
Add dummy text for testimonials, name and website url using Text Tool(T). Refer to the screenshot below for the format.
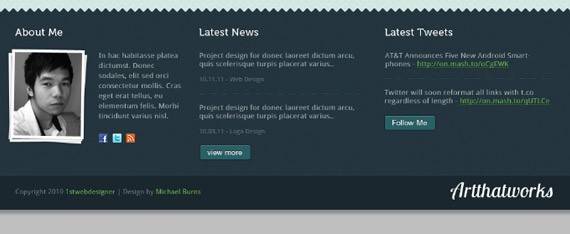
Step 9: Working on Footer
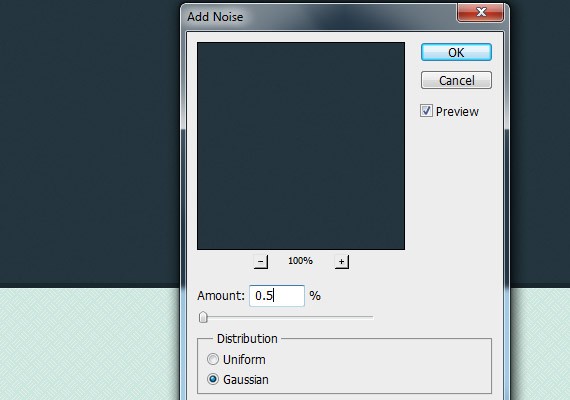
Footer section will contain about, latest news, latest tweets, and copyright text. First we will need to create our base layer, this is just a repeated steps as we did in our header section. Using Rectangle Tool color #23353ecover the remaining section 80px below the testimonials. Next, you will convert it to smart filters by going toFilter – Convert for smart filters, again go to Filter – Noise – Add noise 0.5%.
Make a selection using Rectangle Marquee Tool(M) and fill it with zigzag pattern. Rotate it vertically as shown in the screenshot below.
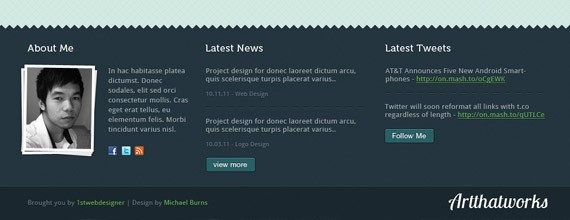
Still this footer section will be divided into three columns. 1st column is for the about section, 2nd for latest news, and 3rd for latest tweets.
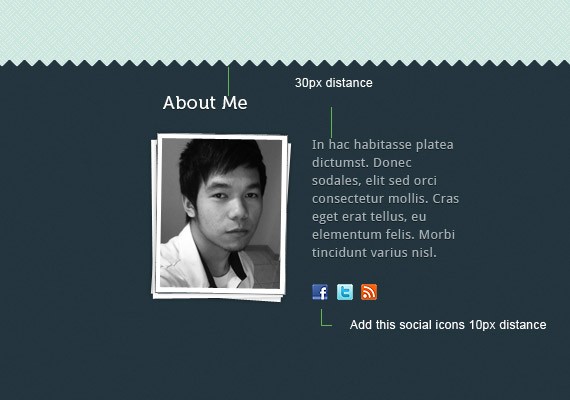
About Me
For the header the font and font color has change to #fff with a 1px #000 drop shadow. The dummy text for about me the text format is Droid Sans 13pt #a4afb4 and apply the same drop shadow.
To create the image thumbnail first you should grab a 130px by 160px image.
Apply this Blending Option
- Outer Glow: #000
- Stroke: #fff
Duplicate it twice and transform it by pressing Ctrl + T and rotate it a bit to the left and right.
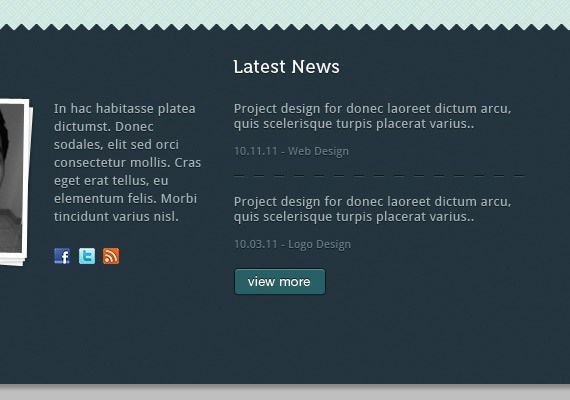
Latest News
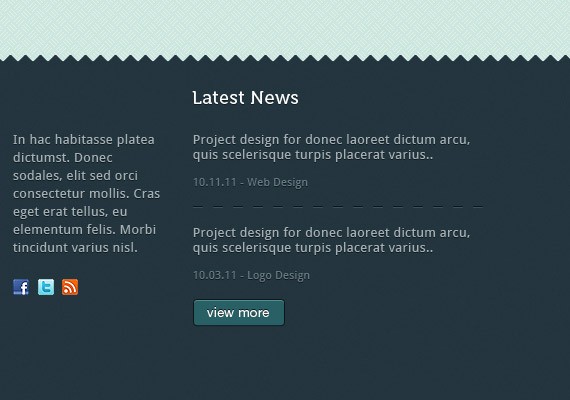
The same header and text. For the date and category color will be 667983, size 11pt. For the dividers color will be #0f161a, #37515e.
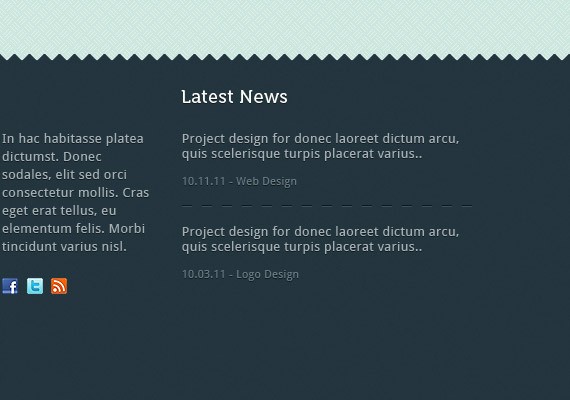
Grab a copy of read more button, change the color to #286065. Text wil be #fff, #0f161a.
Change Blending Option
- Stroke: #0f161a
Result!
Latest Tweets
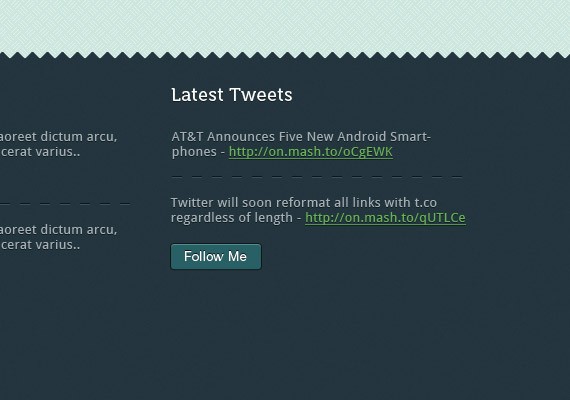
The same text format. Link color #67b256.
Copyright
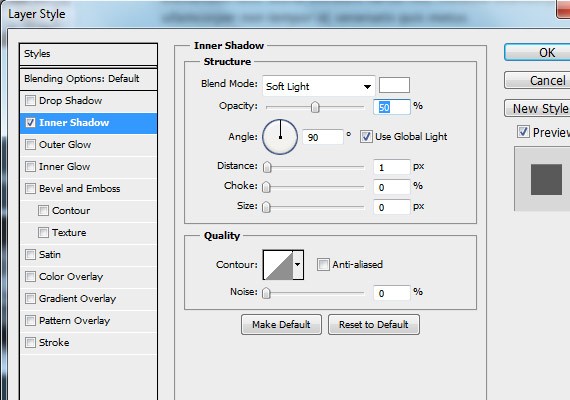
Using Rectangle Tool(U) color #1a272e create a 100% by 70px at the very bottom of the canvas. Apply a noise using the same step as we did to our base layer in our header and footer.
Apply this Blending Option
- Inner Shadow: #fff
Using Text Tool(T) add your copyright text. Droid Sans 12pt color #667983. Also, add a 1px drop shadow. Place this copyright text on the left side, on the other side duplicate a copy of the logo and place it at the bottom right side of our footer.
Wew! Here is our Final Result!
I hope you enjoyed and learned something from this tutorial. If you have questions just drop it below. 🙂